Git Workflow
Git is a powerful version control system that allows developers to collaborate on projects, track changes, and manage code effectively. In this tutorial, we will cover the basics of Git workflows, including branching, merging, and resolving conflicts. Whether you are new to Git or looking to improve your understanding of Git workflows, this tutorial will provide you with the knowledge you need to use Git effectively.
Prerequisites
Before getting started with Git workflows, make sure you have Git installed on your machine. You can download Git from the official website: https://git-scm.com/downloads
You can download free Git Client - Sourcetree.
Daily workflow
1. Open SourceTree
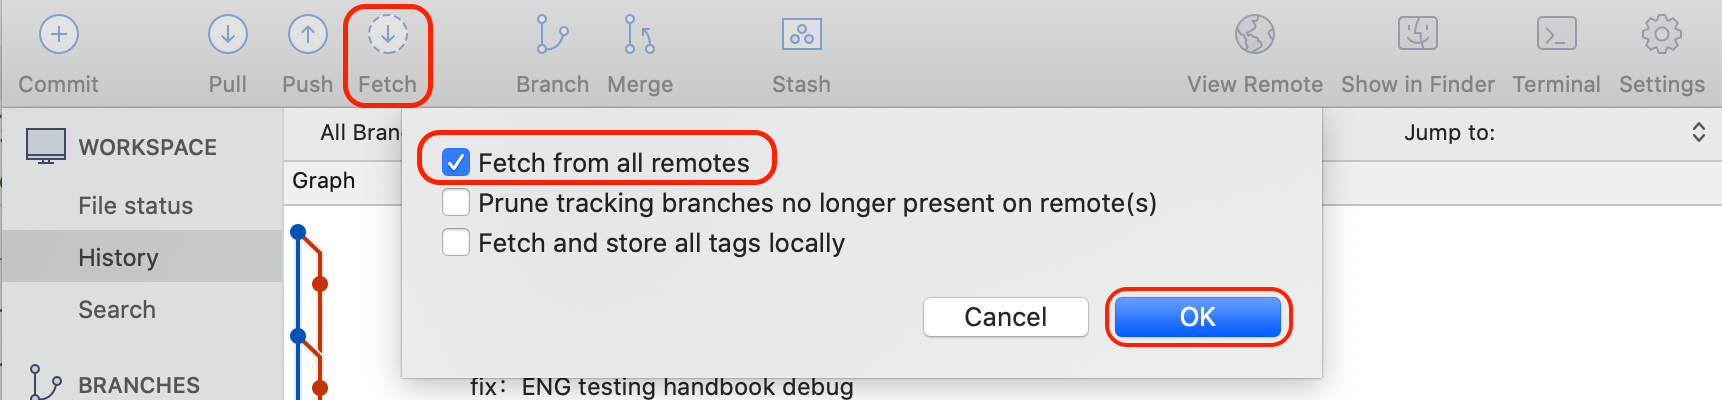
2. Click on Fetch
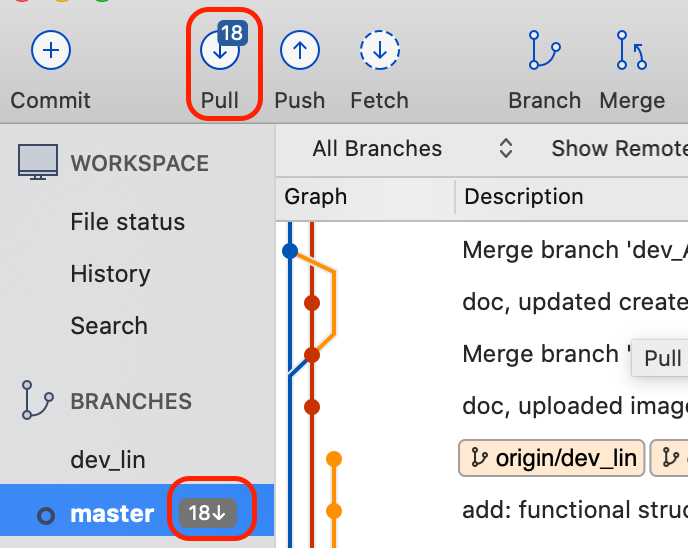
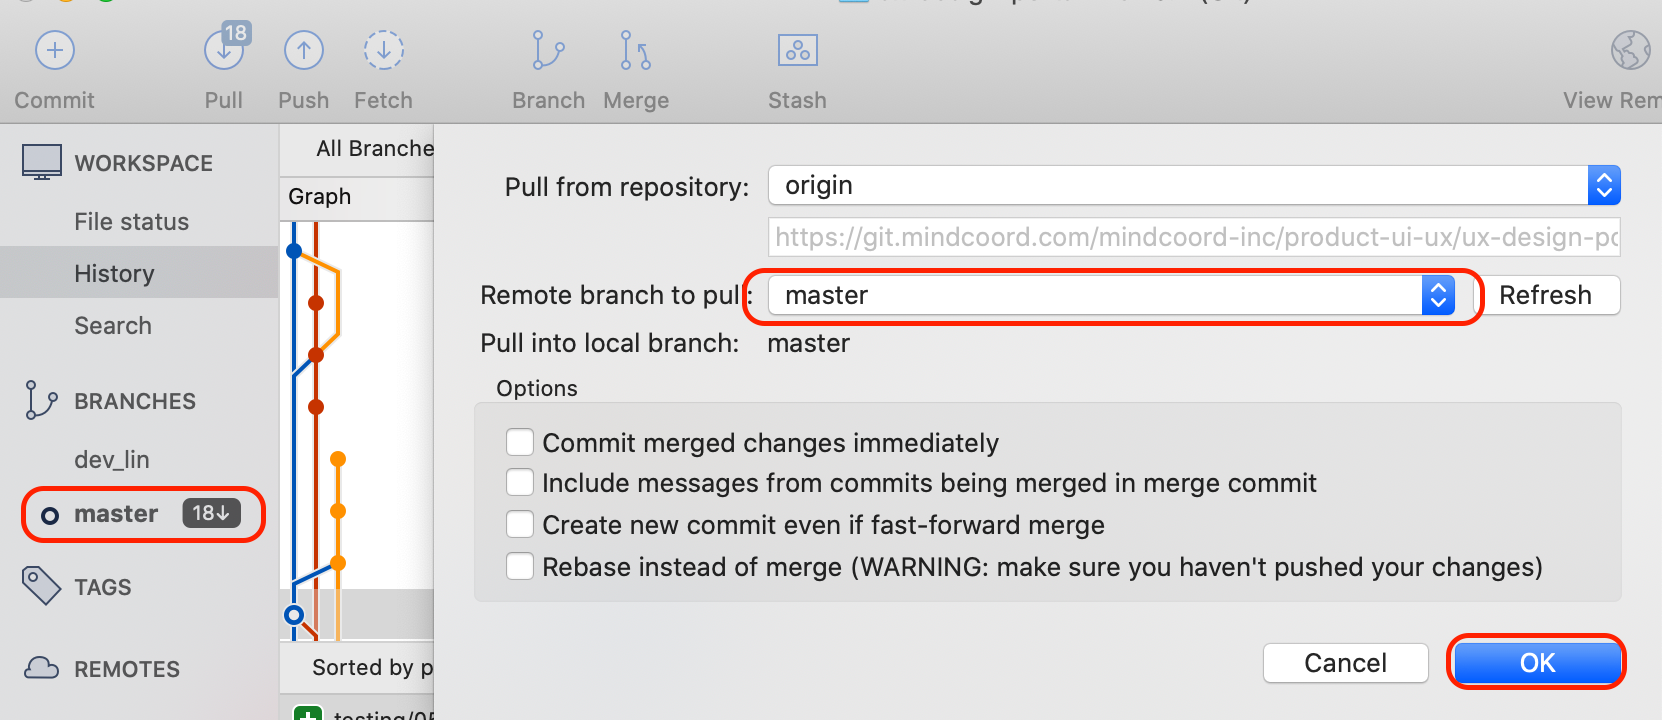
3. Pull updates from master
If you are not in master branch, you need to switch to master branch(locally submit any changes in your current branch if applicable). Then, click on pull button on the top left corner and go to next step. If there is no update, go to step 5.
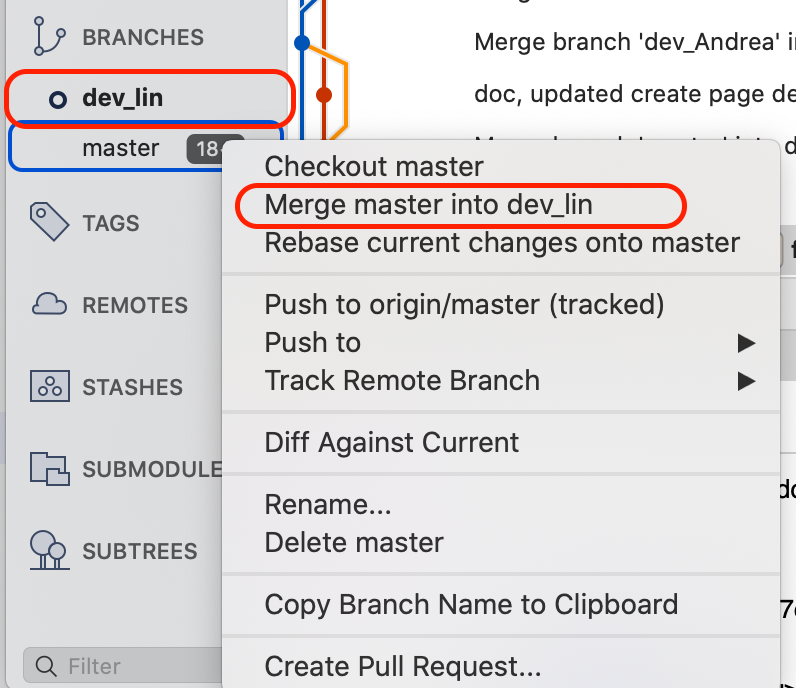
4. Merge master to your branch
After pulling all updates from master branch, go back to your branch. Then, right click on master branch and choose "merge master to dev_xxx" option and click on confirm in pop-up window. If the pop-up window shows there are conflicts, see [how to resolve conflict](/handbook/git-workflow-tutorial/#How to resolve conflicts). If merge is successful, there will be number next to commit button and some text description. You can change the description. Then click on commit, you can save changes to dev_xxx locally. We recommend you to push only once before you go to bed (but can git asap after you get familiar with source tree).
5. Develop only in your branch
Make sure when you make changes to codes or document, you are in your branch instead on master or other branch!
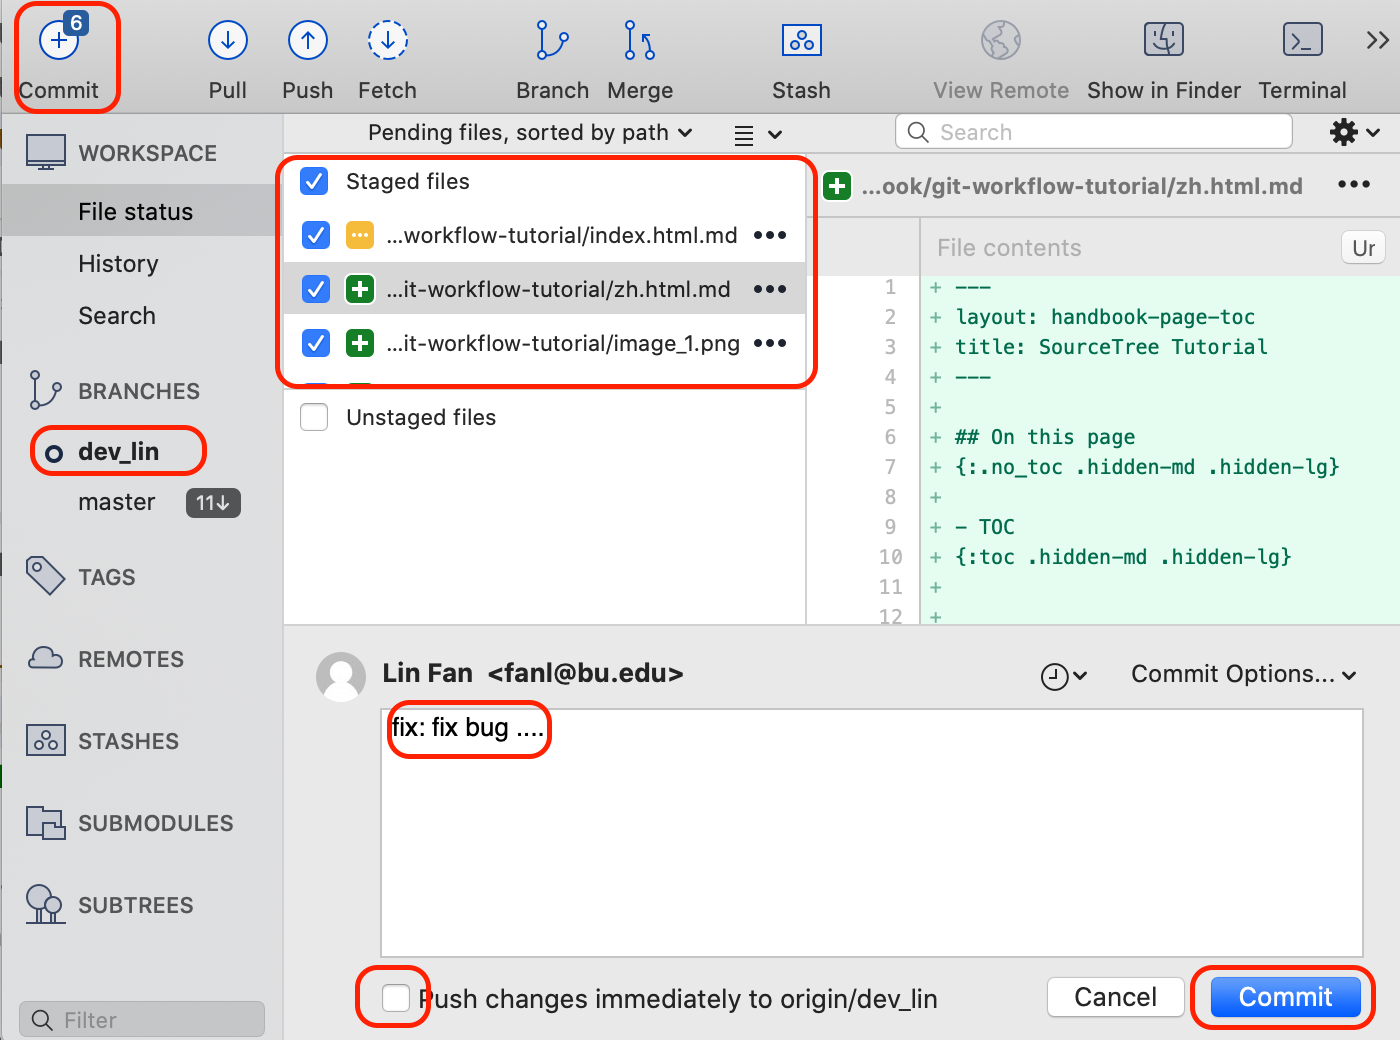
6. Git your changes
When you are done with development, check all unstaged files that you want to submit. After checking them, they will appear in staged file area. Be careful not to check "Push changes to origin/dev_xxx immediately". Checking this option will git all changes to gitlab. Unchecking will submit changes locally instead. Only check when you are 100% sure for the changes.
7. The last step
Go to step 2. If there is update in master branch, go to step 3 and 4 and select push; otherwise, push directly。
How to use git
Git installation and configuration
To use Git, the first step is to install Git. Read the following part according to the operating system you are currently using.
Install Git on Linux
First, you can try type git in command window and check whether the system has Git installed:
sudo apt-get install git
Many Linux will kindly tell you that Git is not installed, and tell you how to install Git.
If you happen to use Debian or Ubuntu Linux, you can install Git directly through a "sudo apt-get install git", which is very simple.
For older Debian or Ubuntu Linux, the command should be changed to "sudo apt-get install git-core", because there used to be a software called GIT (GNU Interactive Tools), so Git can only be called git-core. Since Git is so famous, GNU Interactive Tools was changed to gnuit, and git-core was officially changed to git.
If it is another Linux version, you can install it directly from the source code. First download the source code from the Git official website, then unzip it, and enter the following commands: "/img/handbook-image/tutorial/config", "make", "sudo make install" to install it.
Install Git on Mac OS X
If you are using Mac for development, it is recommended to download binary installation file directly, and double-click to install after downloading.
Install Git on Windows
To use Git on Windows, you can directly download the installer from the official Git website, and then press the default option to go to the next step, and then install it directly in the next step.
After the installation is complete, find "Git" -> "Git Bash" in the start menu. A command line window will pop up, indicating that the Git installation is successful!
Configure git environment
After the installation is complete, the last step is to type in the command line:
git config --global user.name "Your Name"
git config --global user.email "email@example.com"
The user name and email address here can be filled in at will. It only represent an individual's identity
Most Git servers use SSH public keys for authentication. Before using Git, you must confirm whether there is an SSH public key and secret key on your computer. Generally speaking, they exist in the C:\Users\Username.ssh directory. If there is no such directory, then we need to use Git to create an SSH key/public key.
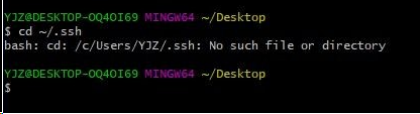
Confirm whether the .ssh folder exists
Right-click on the computer desktop and select Git Bash Here. The following window will pop up. Enter cd ~/.ssh, and it will prompt No such file or directory, indicating that there is no .ssh folder on our computer.
Create private key
Type ssh-keygen -t rsa -C'pageguo@Hyletic.com'
You will be asked to choose storage location. If you choose the default, you may be prompted that the id_rsa file already exists. If this happens, you can go back to the previous step and manually select the storage location.
Then you will be prompted to enter the password. The password can also be blank. Generally, I personally choose to leave it blank. Note that if you enter the password, it will not be displayed in the window.
Not when we look for the .ssh folder, we will find that the directory has been created and there are two files id_rsa and id_rsa.pub. The former is what we call SSH private keys, and the latter is SSH public keys. The .ssh directory is by default in C:\Users\Username.ssh
The directory may be different but The directory in parentheses is where your .ssh directory is located. Because it is a hidden file that starts with ., the user needs to set up in setting/preference to be able to view hidden files.
Configure public key to gitlab
Since our Gitlab repository is a private repository, in general, other people have no access rights.
So we need to log in to Gitlab,right click on your profile photo on the right top corner and choose settings to find ssh keys.
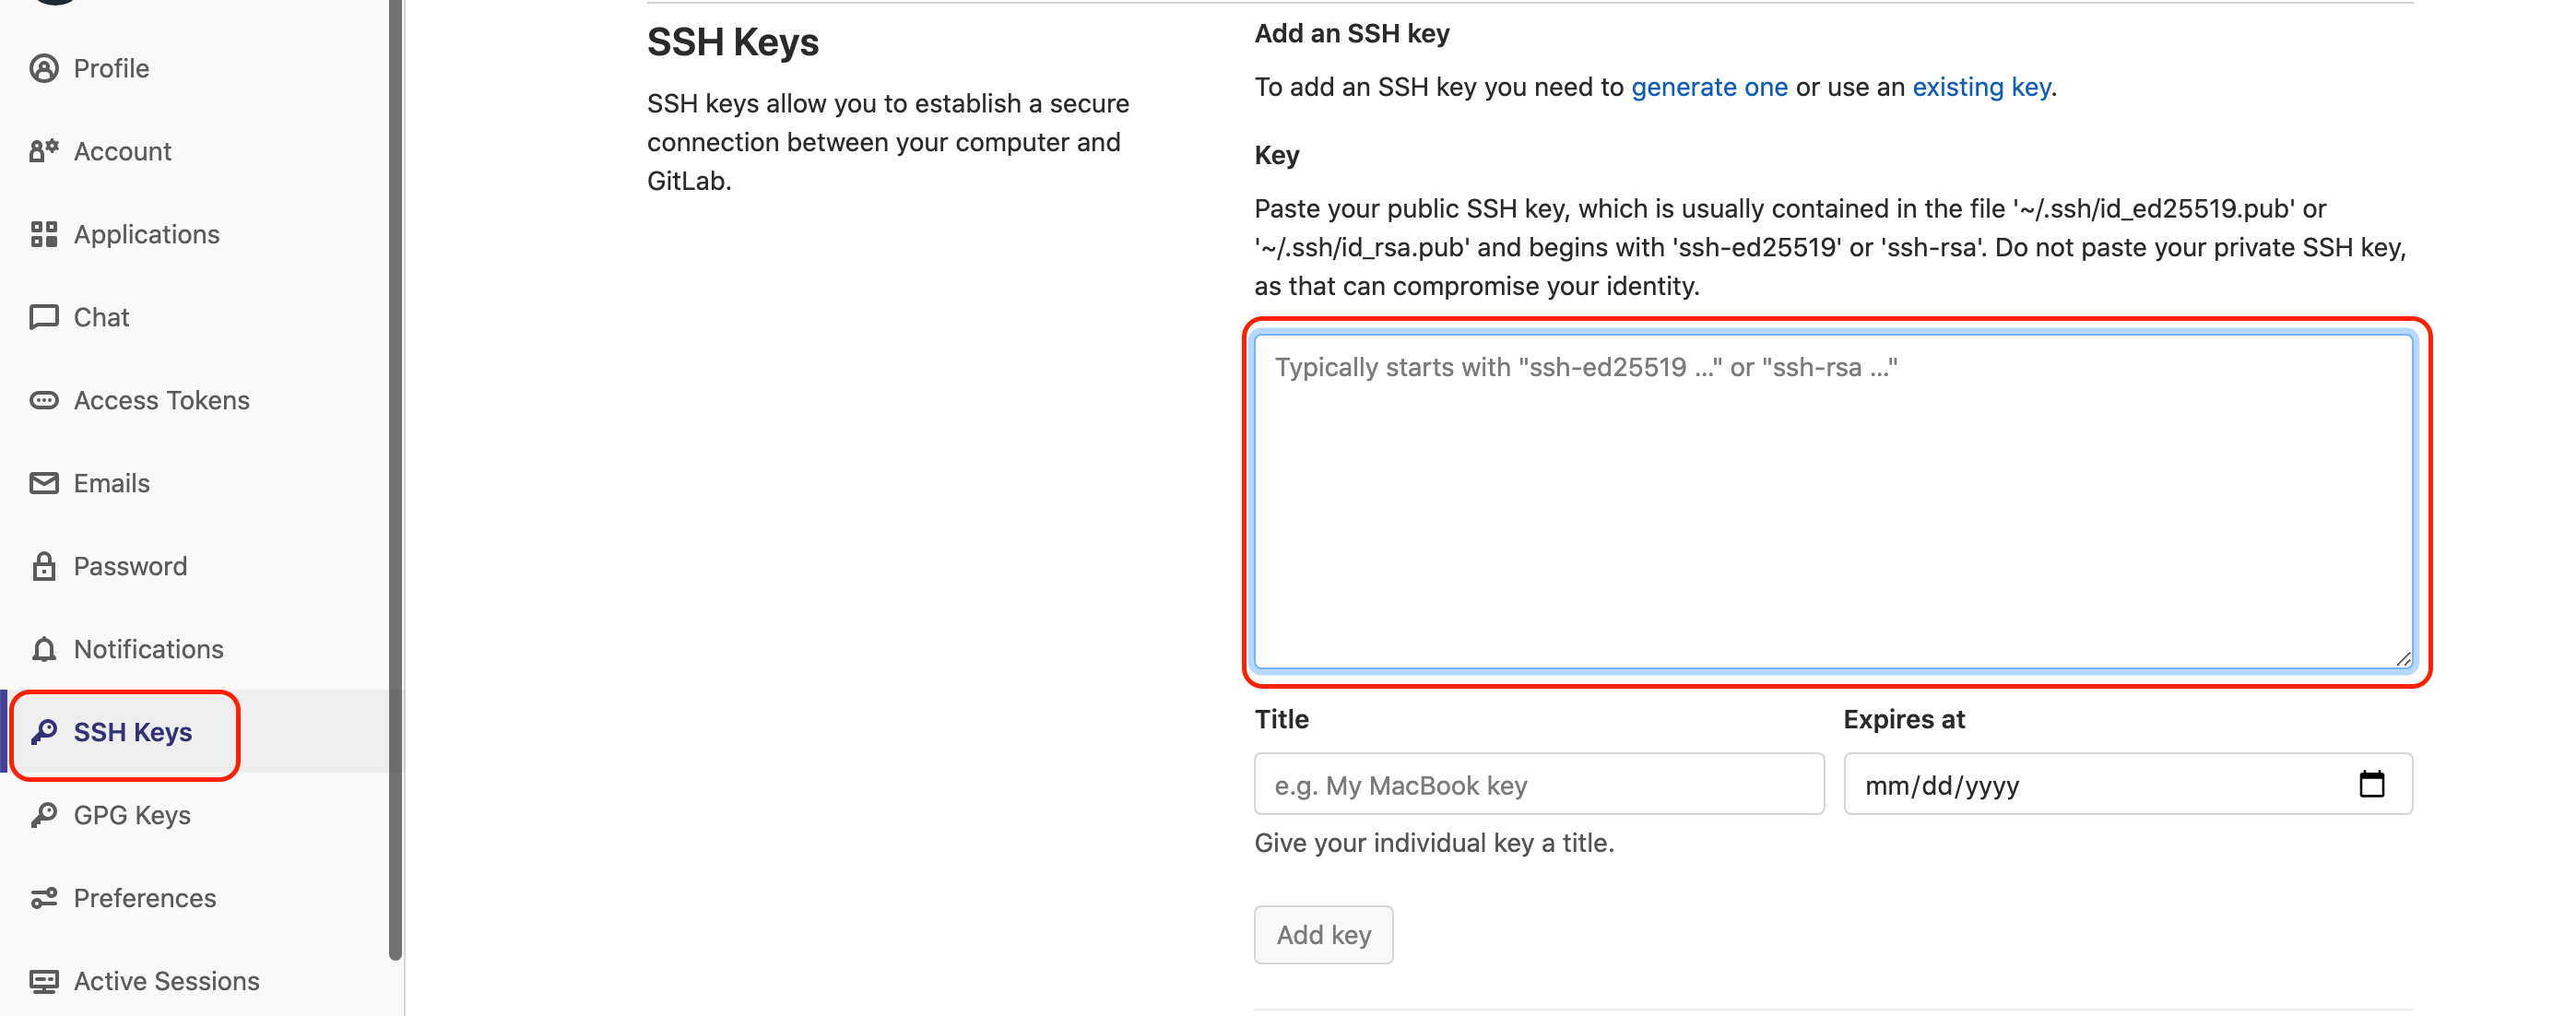
用记事本打开刚才生成的id_rsa.pub文件,复制里面的内容到输入框,然后选择保存
SourceTree Installation and Configuration
Sourcetree simplifies how to interact with Git repositories. Repositories can be visualized and managed through Sourcetree's simple Git GUI.
SourceTree Installation
Go to official website to download SourceTree and install.
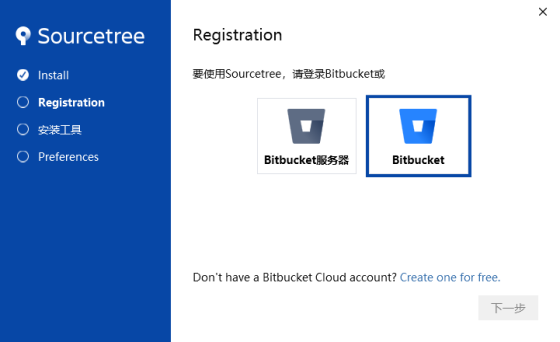
Choose to create a new Bitbucket account, and then come back to log in to the account.
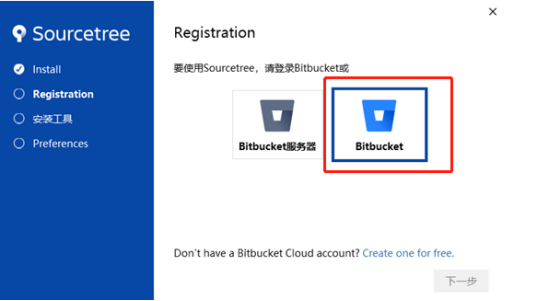
If you are prompted whether to load the private key, you can choose No

Next, you can choose the installation path of git:
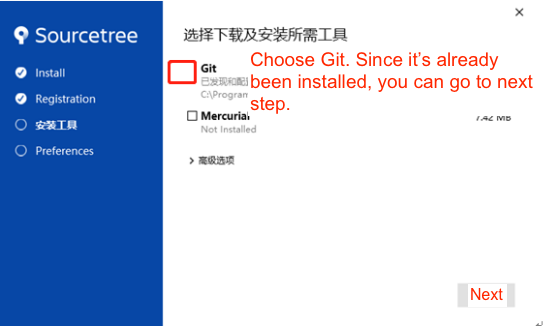
In this step, we have installed Git before and filled in the global username and email address. So it will be automatically recognized, if not, you can manually add your username and email in the options.
Install Beyond Compare
BeyondCompare is a read-write plugin for conflict resolution and difference comparison. The download link is here, and you can go directly to the official website to download the corresponding version.
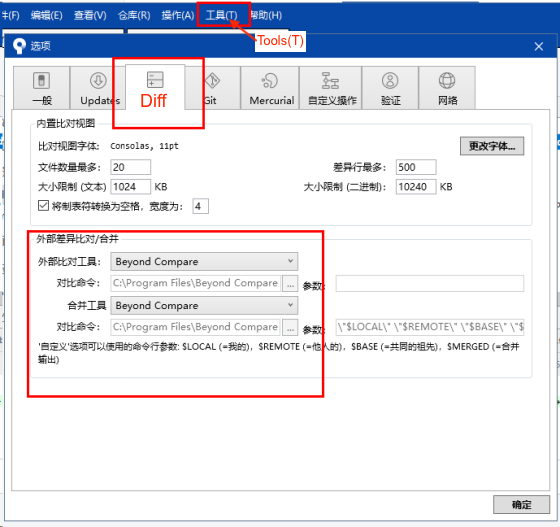
Windows/Linux
After the installation is complete, open SourceTree, select Tools—>Options, find Compare, and then fill in the installation path of BeyondCompare
Mac
For mac, click on preferences -> Diff. Fill in corresponding infos as below.
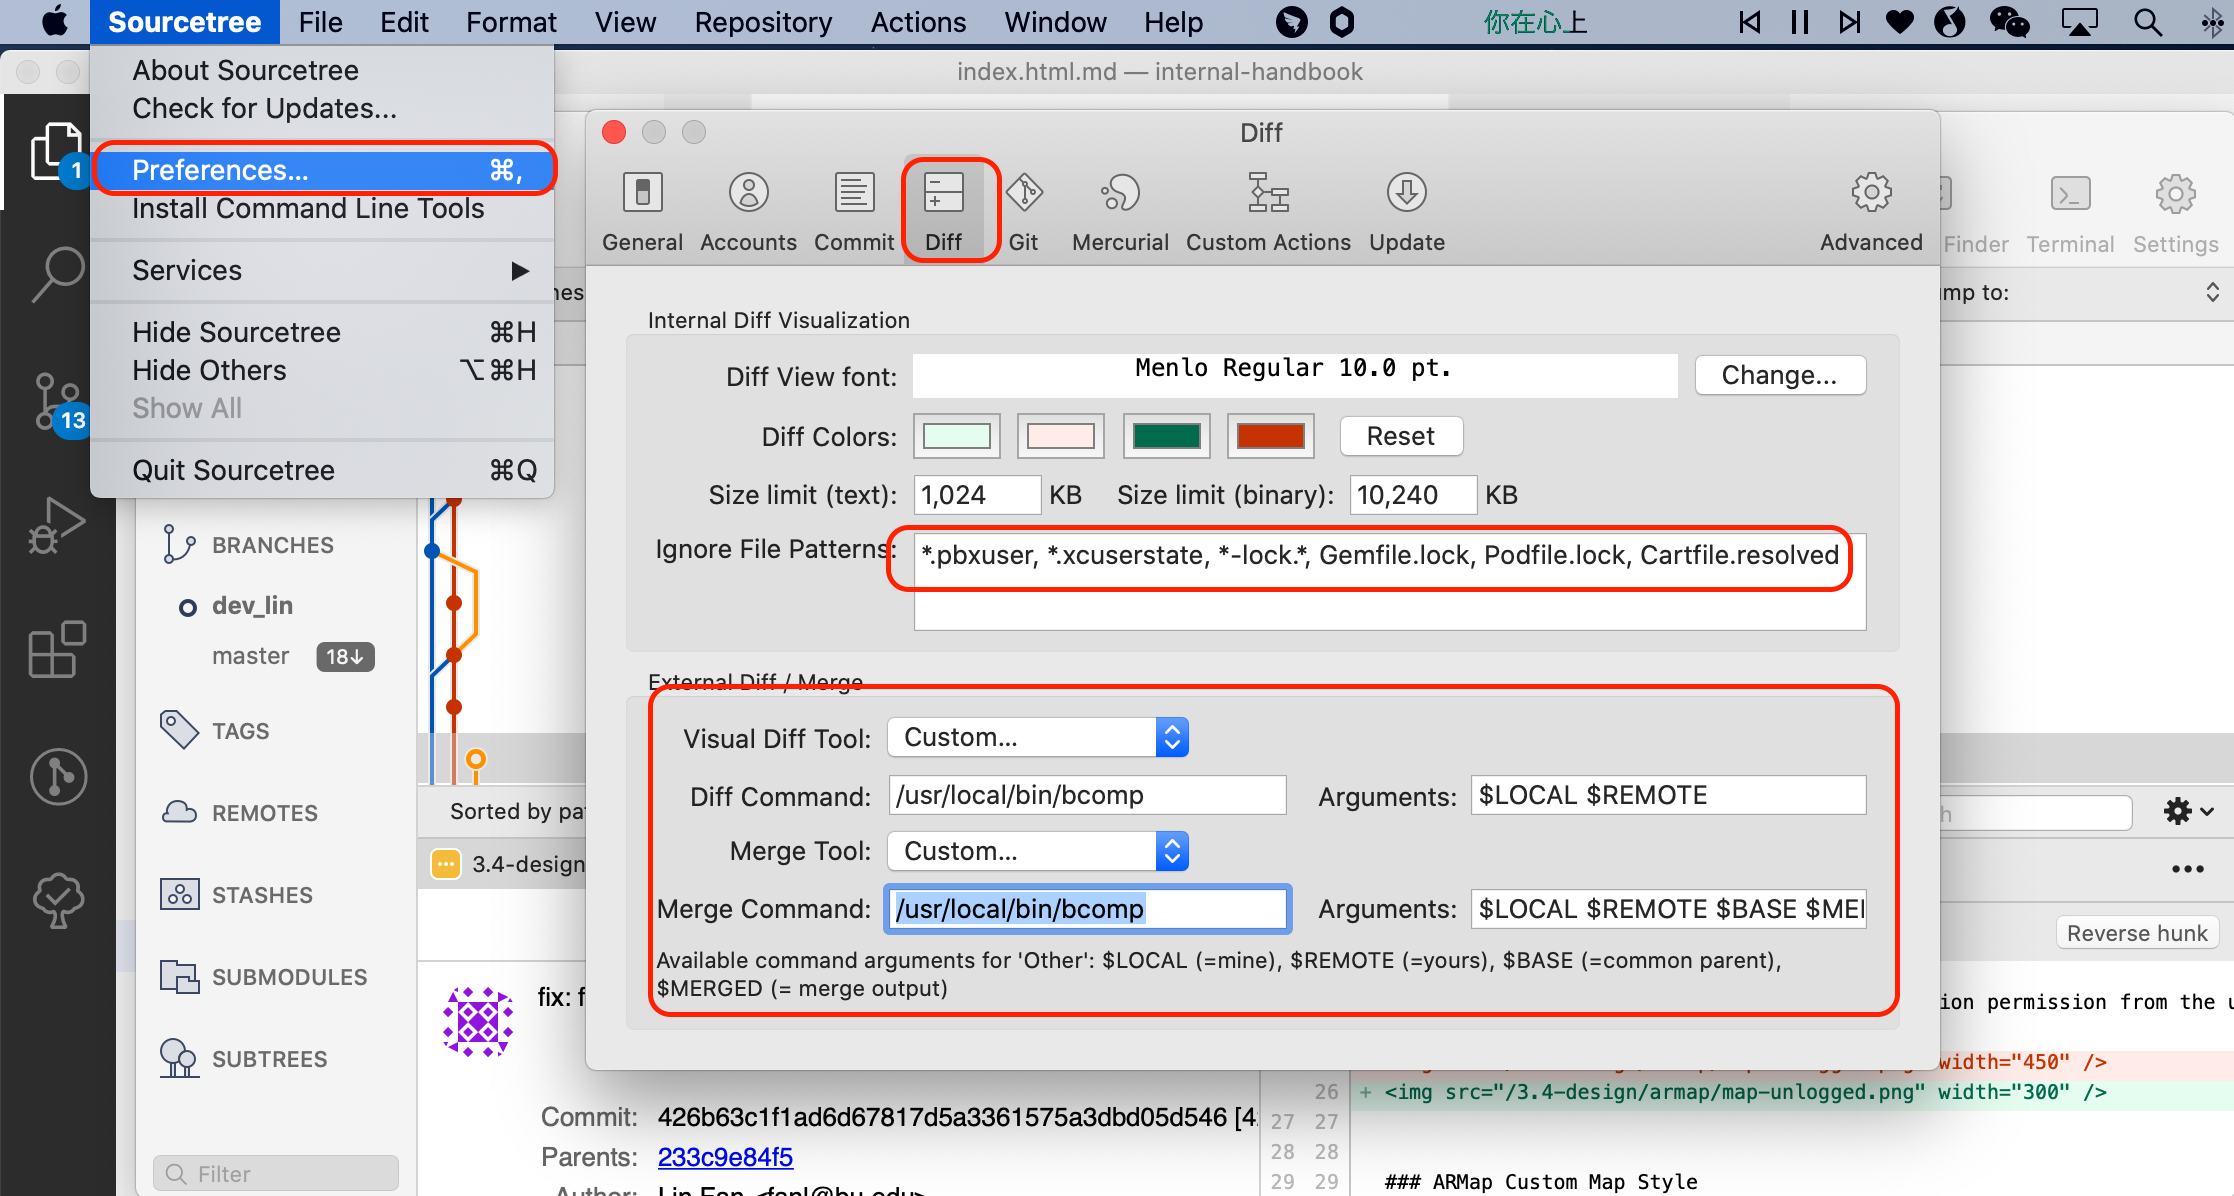
Ignore File Patterns
Visual Diff Tool: Other
Diff Command: /usr/local/bin/bcomp
Arguments: $LOCAL $REMOTE

Merge Tool: Other
Merge Command: /usr/local/bin/bcomp
Arguments: $LOCAL $REMOTE $BASE $MERGED
How to use source tree
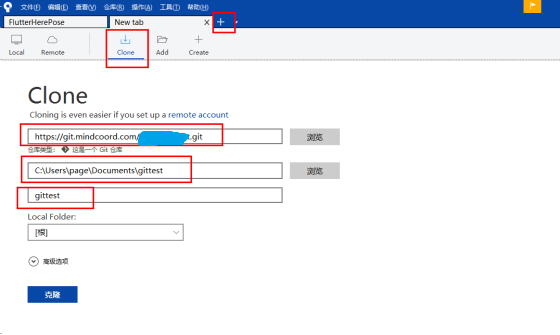
Clone repository
Clone function downloads remote repository to local repository(that is, a workspace).
For windows, click Clone as shown in the figure below, and the storage location can be specified by yourself.
For Mac, choose New -> clone from URL and fill in correspondingly.
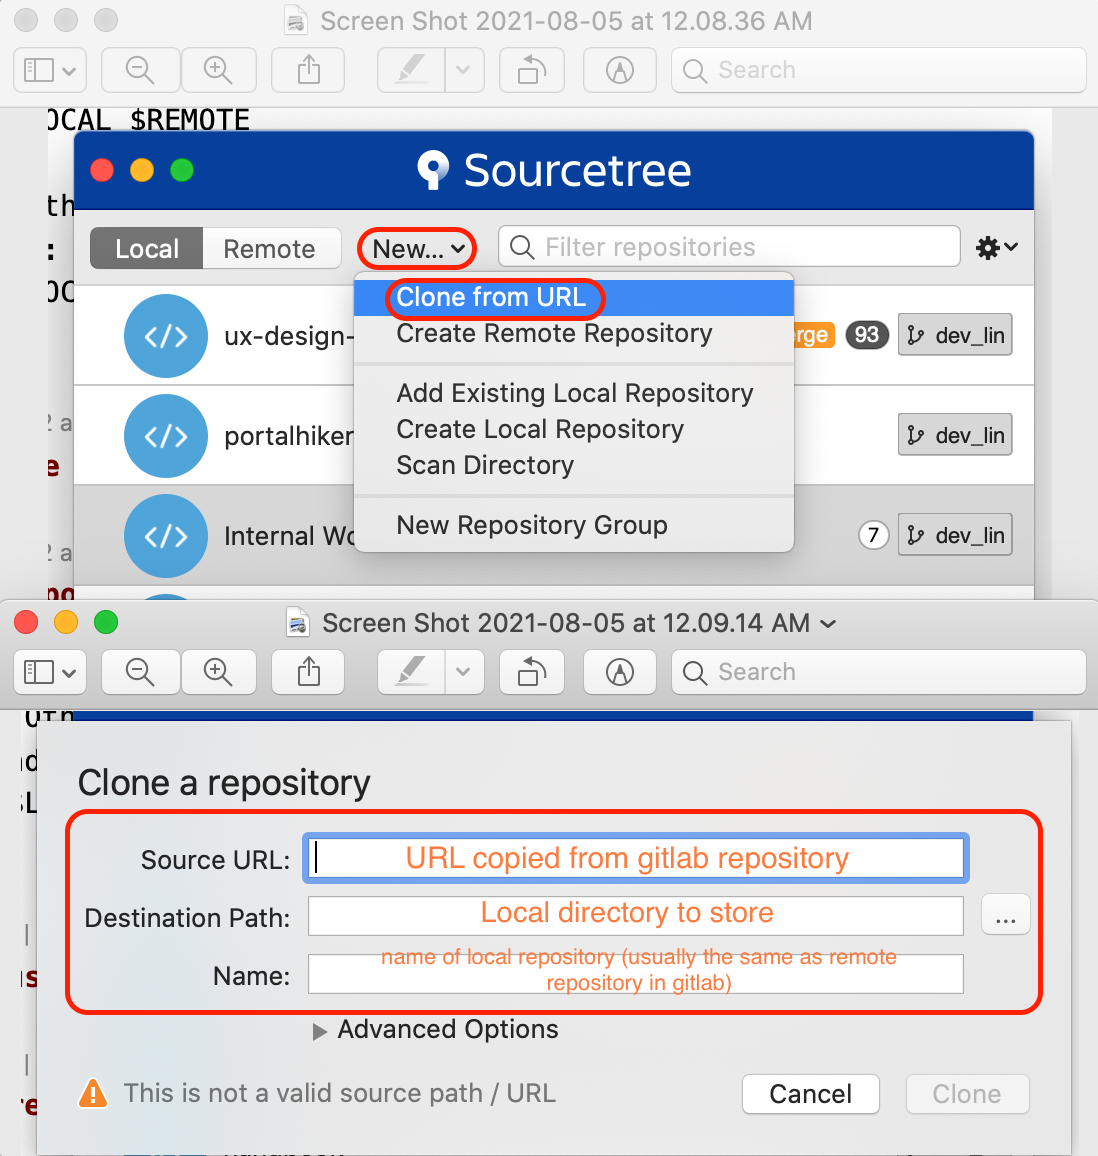
If it is the first time to clone, you may be asked to enter your password. (PS: The account is usually the Hyletic mailbox corresponding to your gitlab, and the password is the password of gitlab)
For windows
If the cloning speed is very slow (especially for those in China), please use VPN for git. After configuring local proxy, open "Tools" —> "Options" —> "Network", add a custom proxy, the specific configuration is shown in the figure :
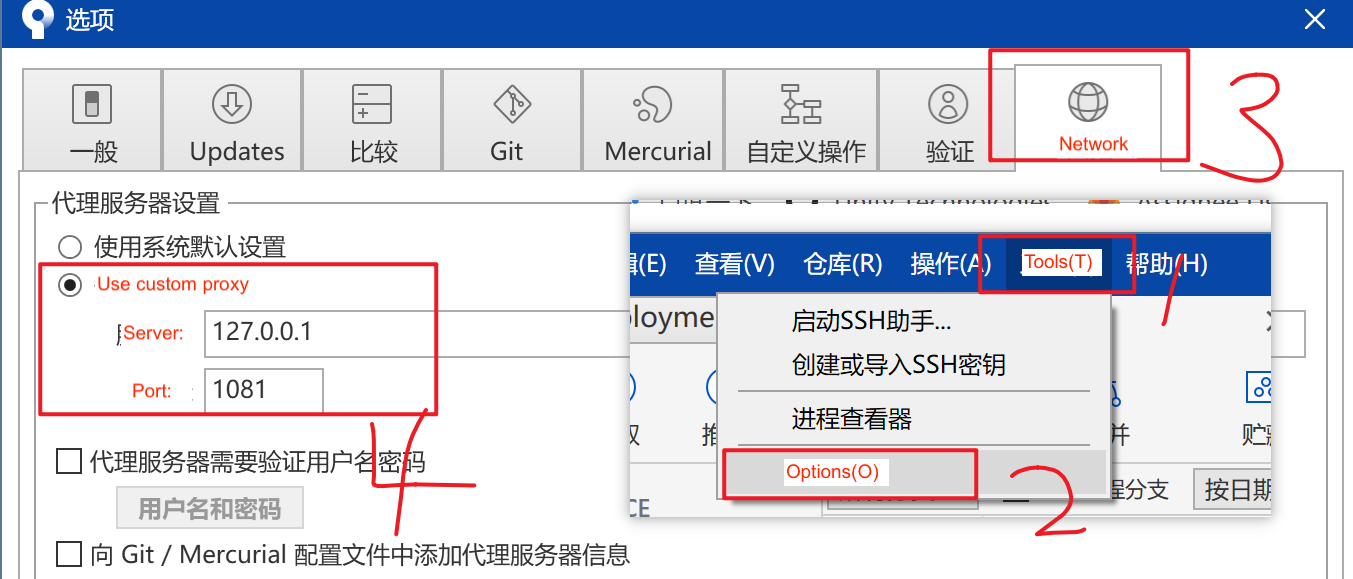
Note that your ip and port should be consistent with your local one. If it is a proxy configured according to the above tutorial, use the default value; if you are using your own VPN, please set the port yourself. In addition, Please ensure that in SourceTree, you use the git installed above instead of the git embedded in SourceTree. In order to verify this, your local settings should be as shown in the following figure.

For Mac
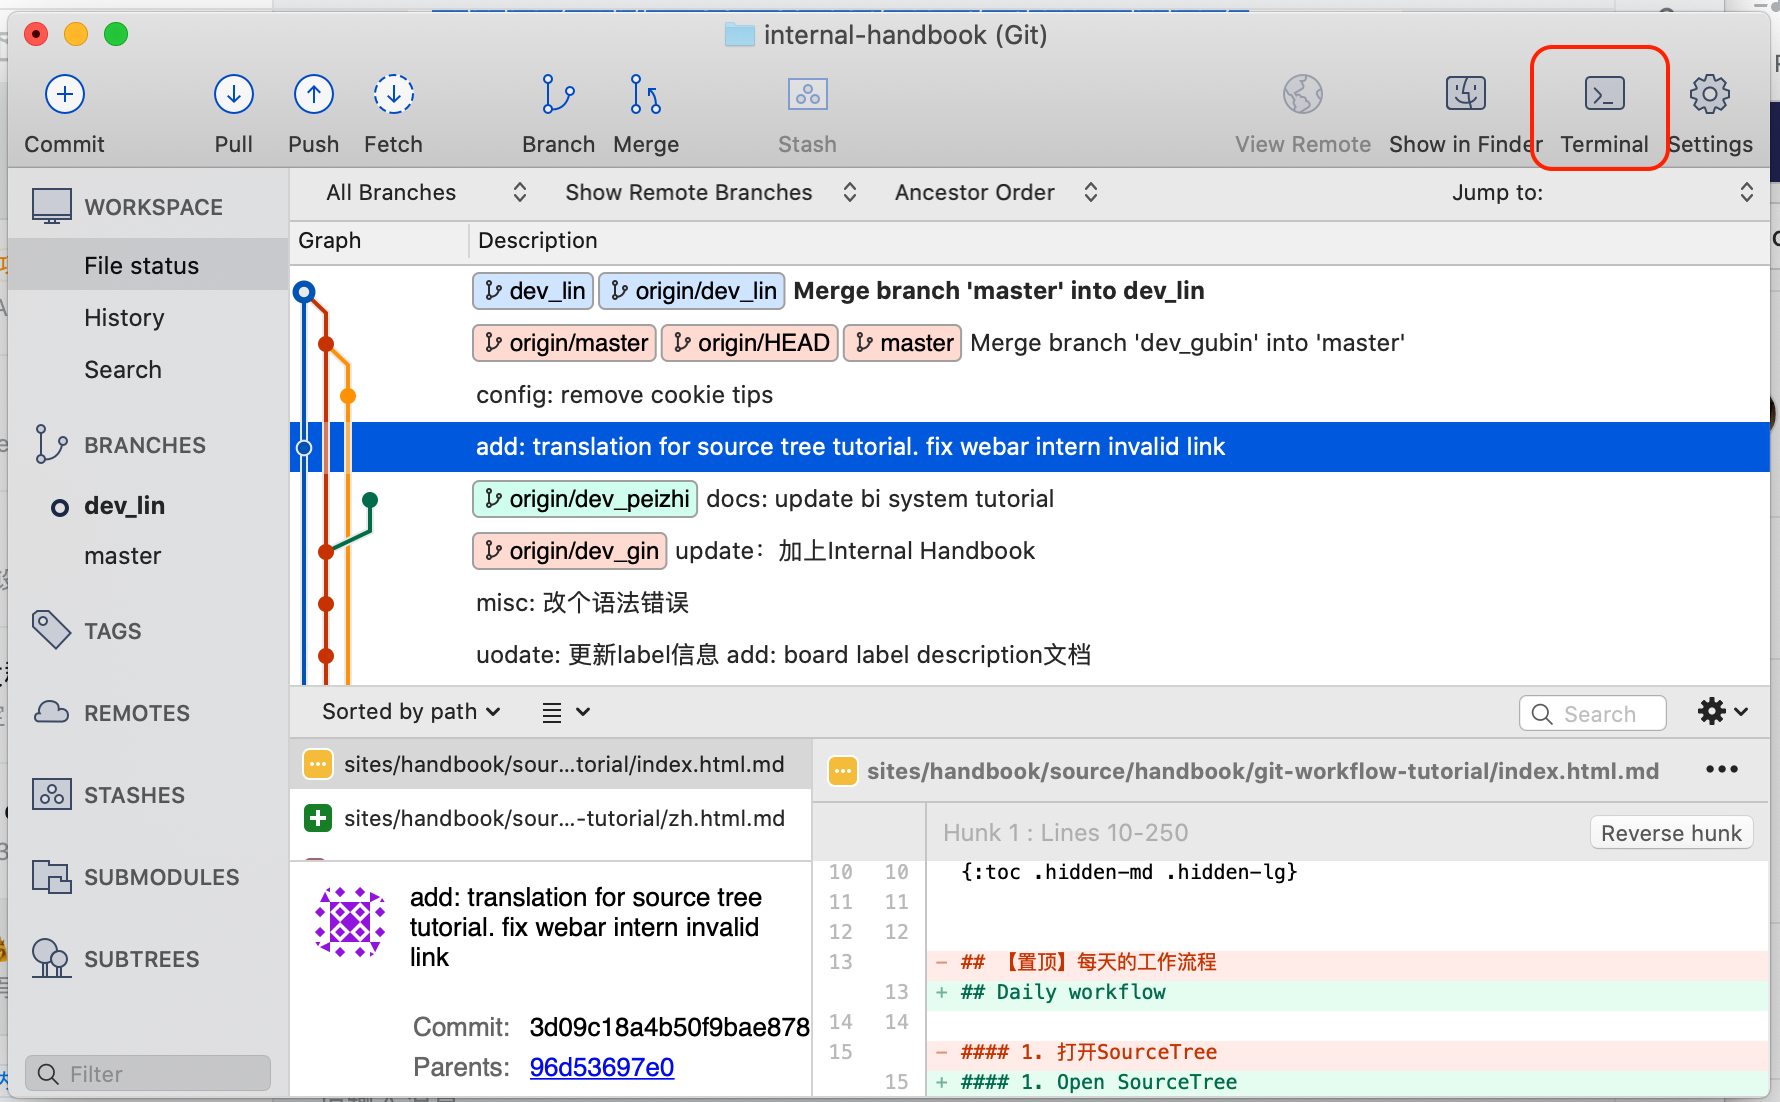
If you are using mac, open Terminal on top right corner and execute the following command.
git config --global https.proxy http://127.0.0.1:1081 && git config --global https.proxy http://127.0.0.1:1081
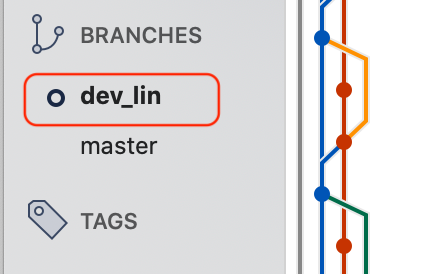
Add your branch to workspace
Click the origin in the remote on the left panel to find your branch. Then double-click (or right click and select checkput), and click checkout in the pop-up window.

Now you can enter the local dev_xxx workspace
Pull
Click pull button in the upper panel. The first step after entering SourceTree every time is to pull the latest version on the remote master branch. Note that you must choose to pull the content of the master, and then merge it into your branch.
Modify code
Please make sure that you have pulled the latest version of the master before writing the code. There are not too many restrictions on writing code, just use VSCode or AndroidStudio for development.
Push
Each user has version control locally. Therefore, version control development can still be carried out offline. It is generally not recommended to directly submit to the remote server. We first submit the modified code to the local repository, and push to remote repository only after testing has been done and no bug exists.
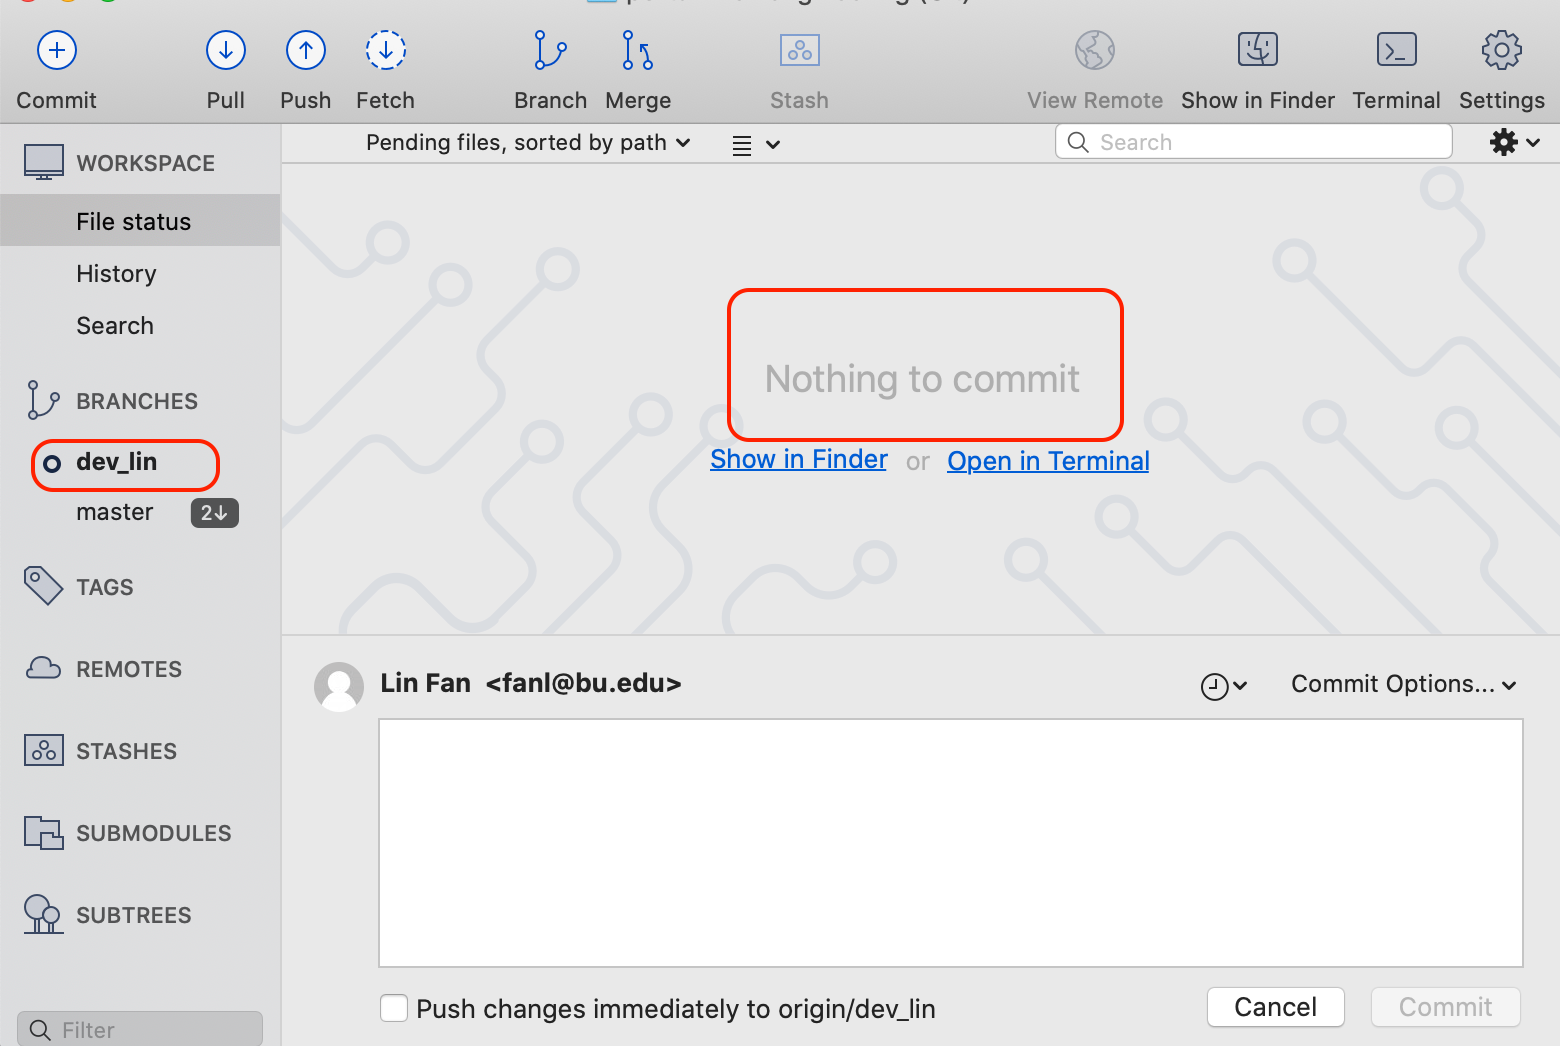
When you have not made any changes, your personal workspace dev_xxx is generally empty, as shown in the figure below.
When you modify the code, all your changes will be displayed in the work area.
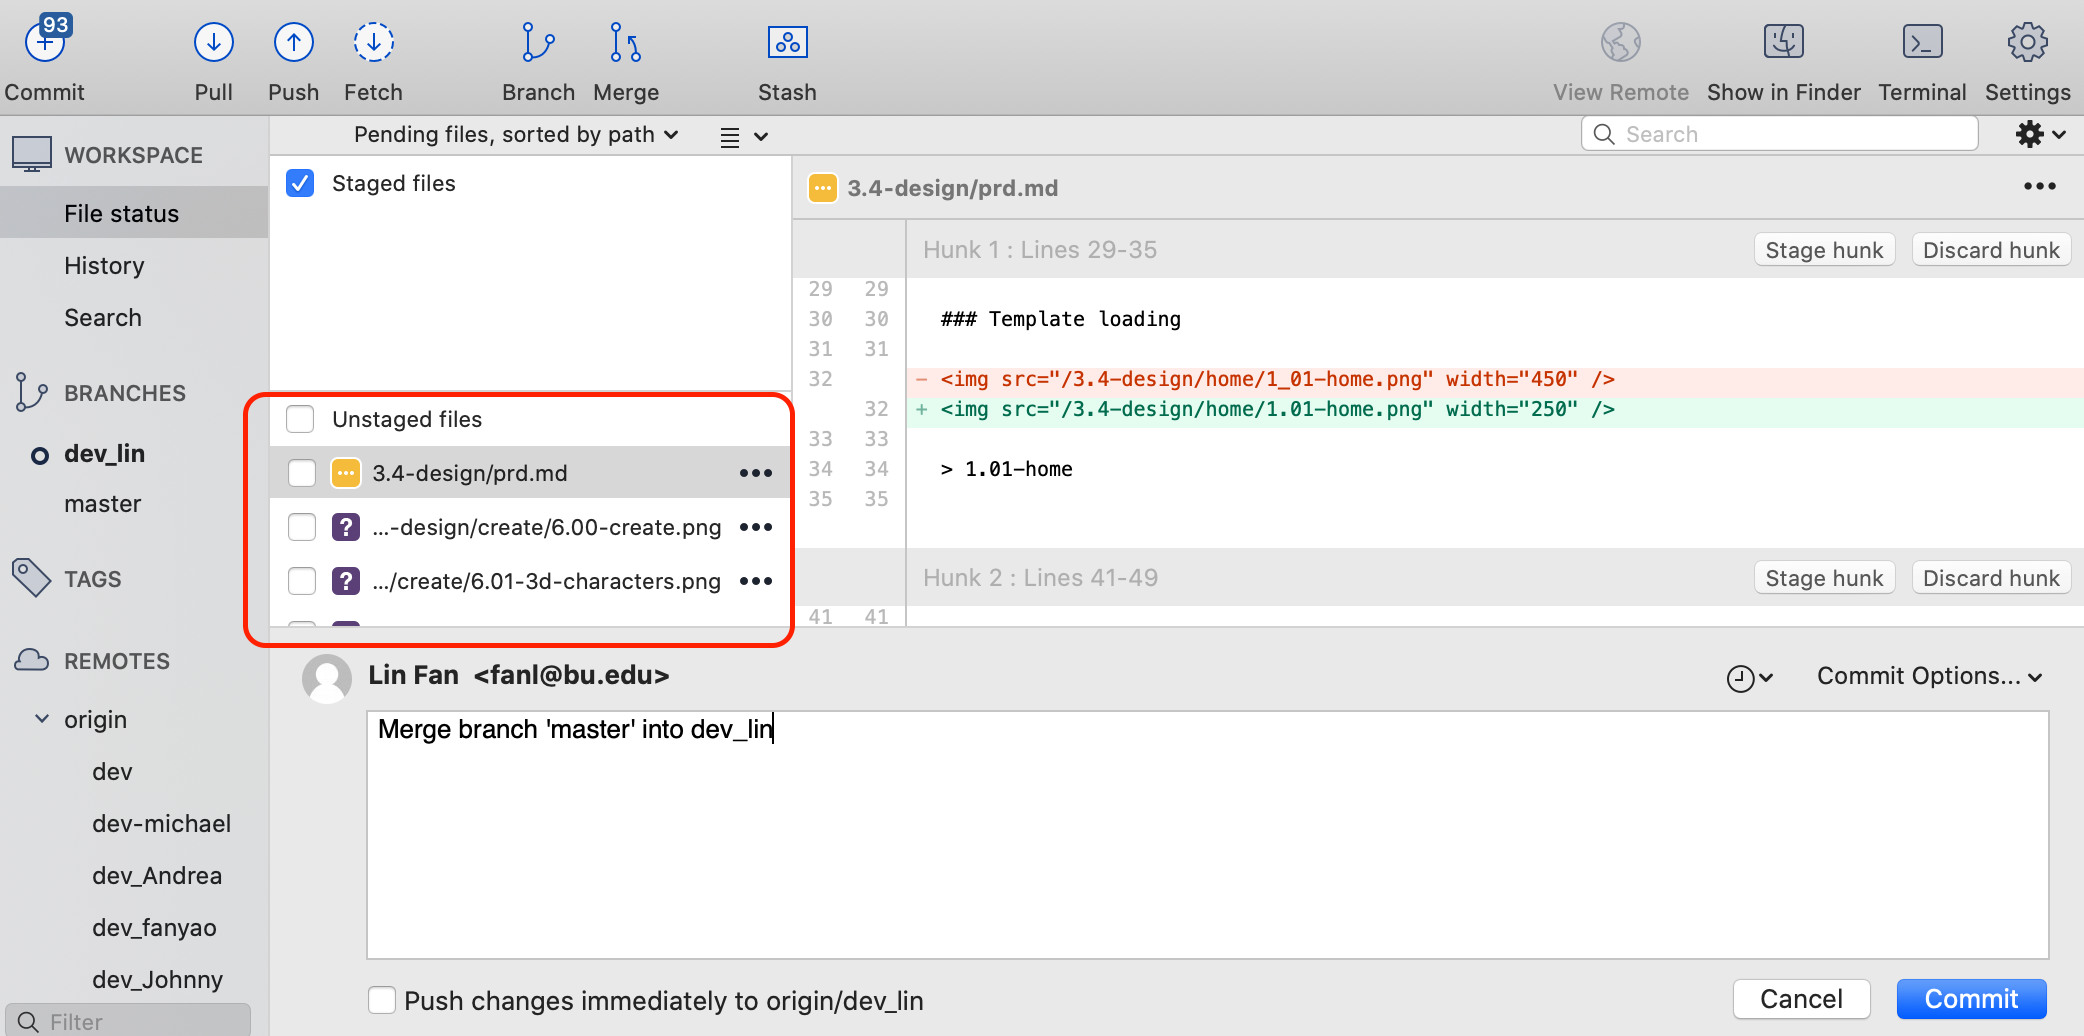
After you have finished editing, you can click all Unstaged File, and the files will appear in the upper Staged File area. If you want to submit your code at this time, add a description of the modified content and click Submit.
If you are submitted locally, then you want to push to dev_xxx, you can click on push button on the top left corner.
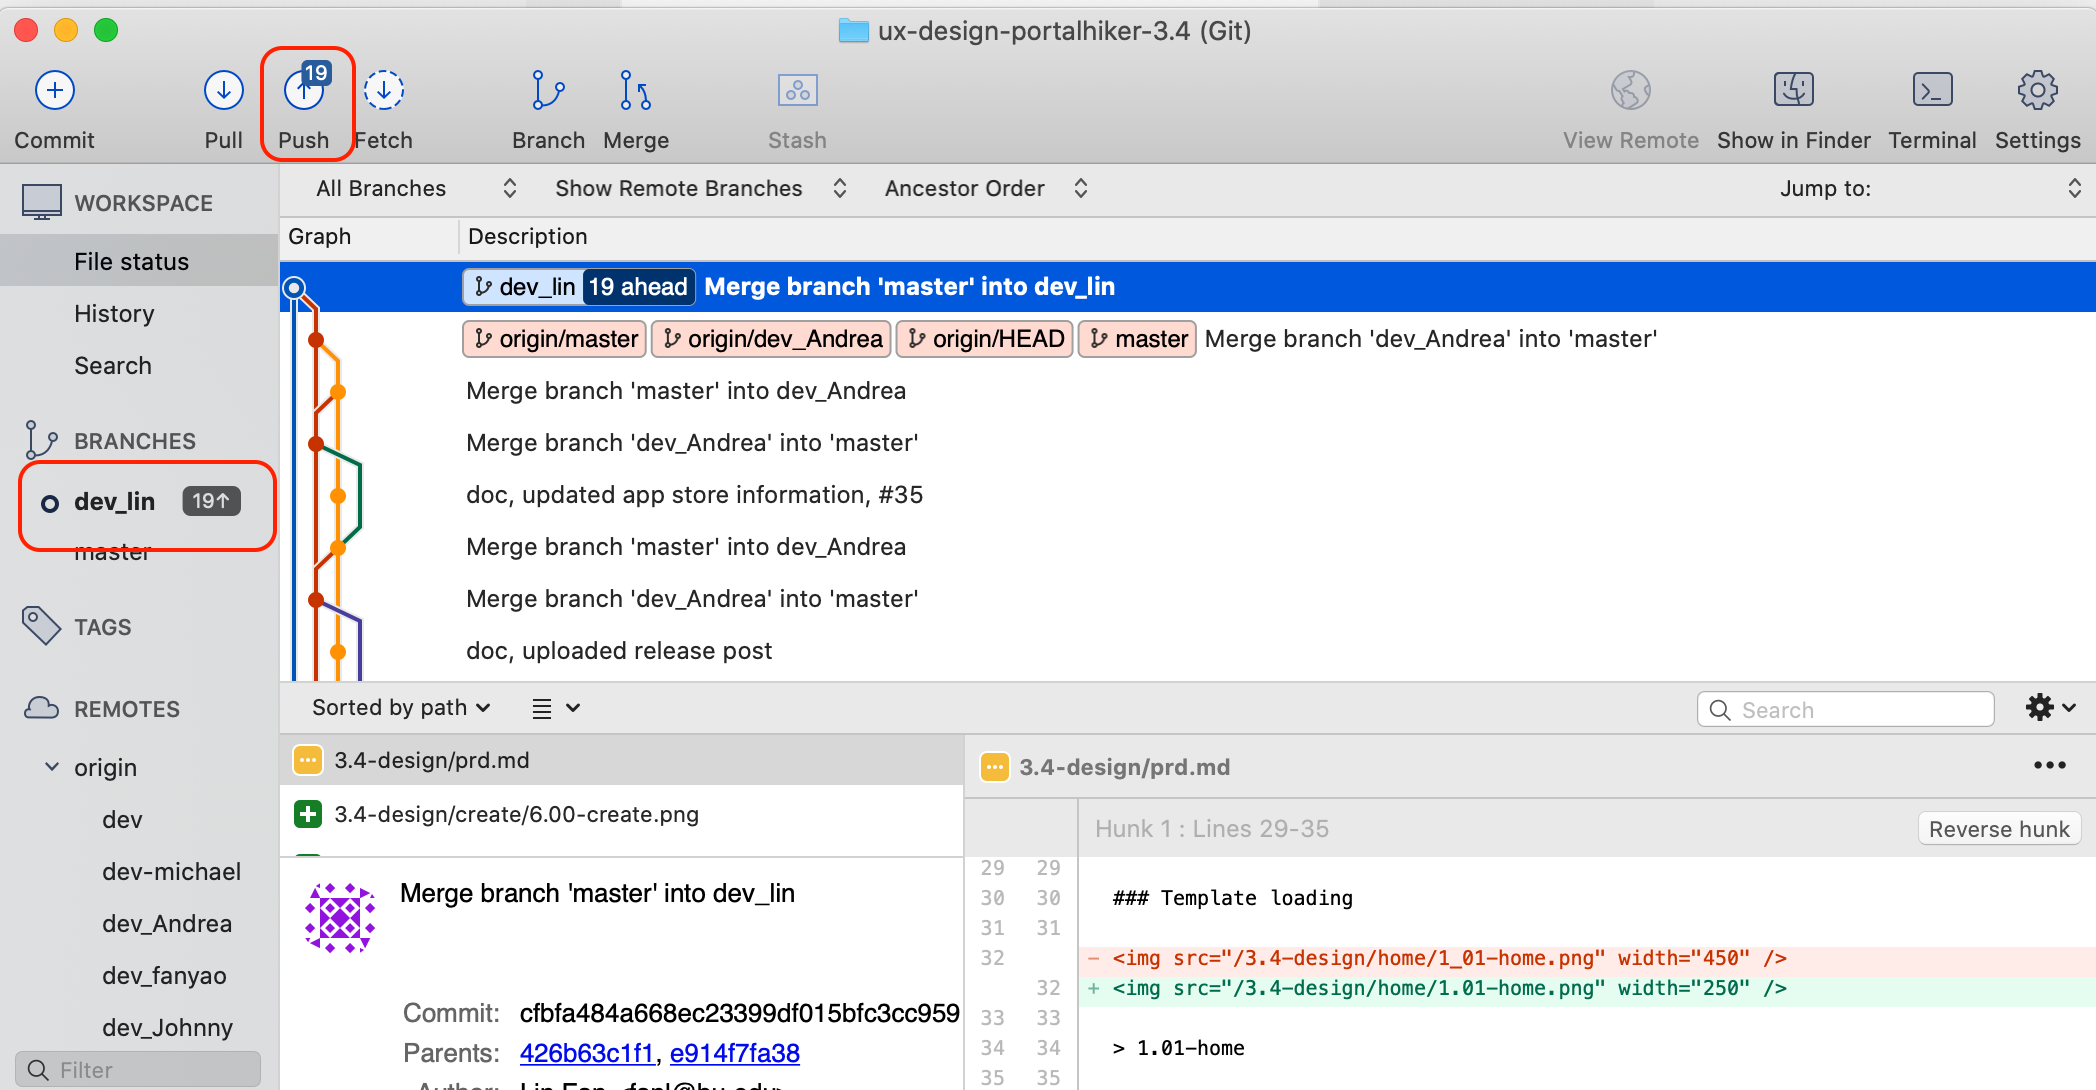
Before you push to remote repository, there will be a pop up prompt. If you haven't finished the development, you don't have to push. But if you are afraid that others will modify the same file at the same time, you can also submit it directly to the remote server(since the one(edited the same file) who submit later will have to resolve conflicts). Note that you must only push to your dev branch.
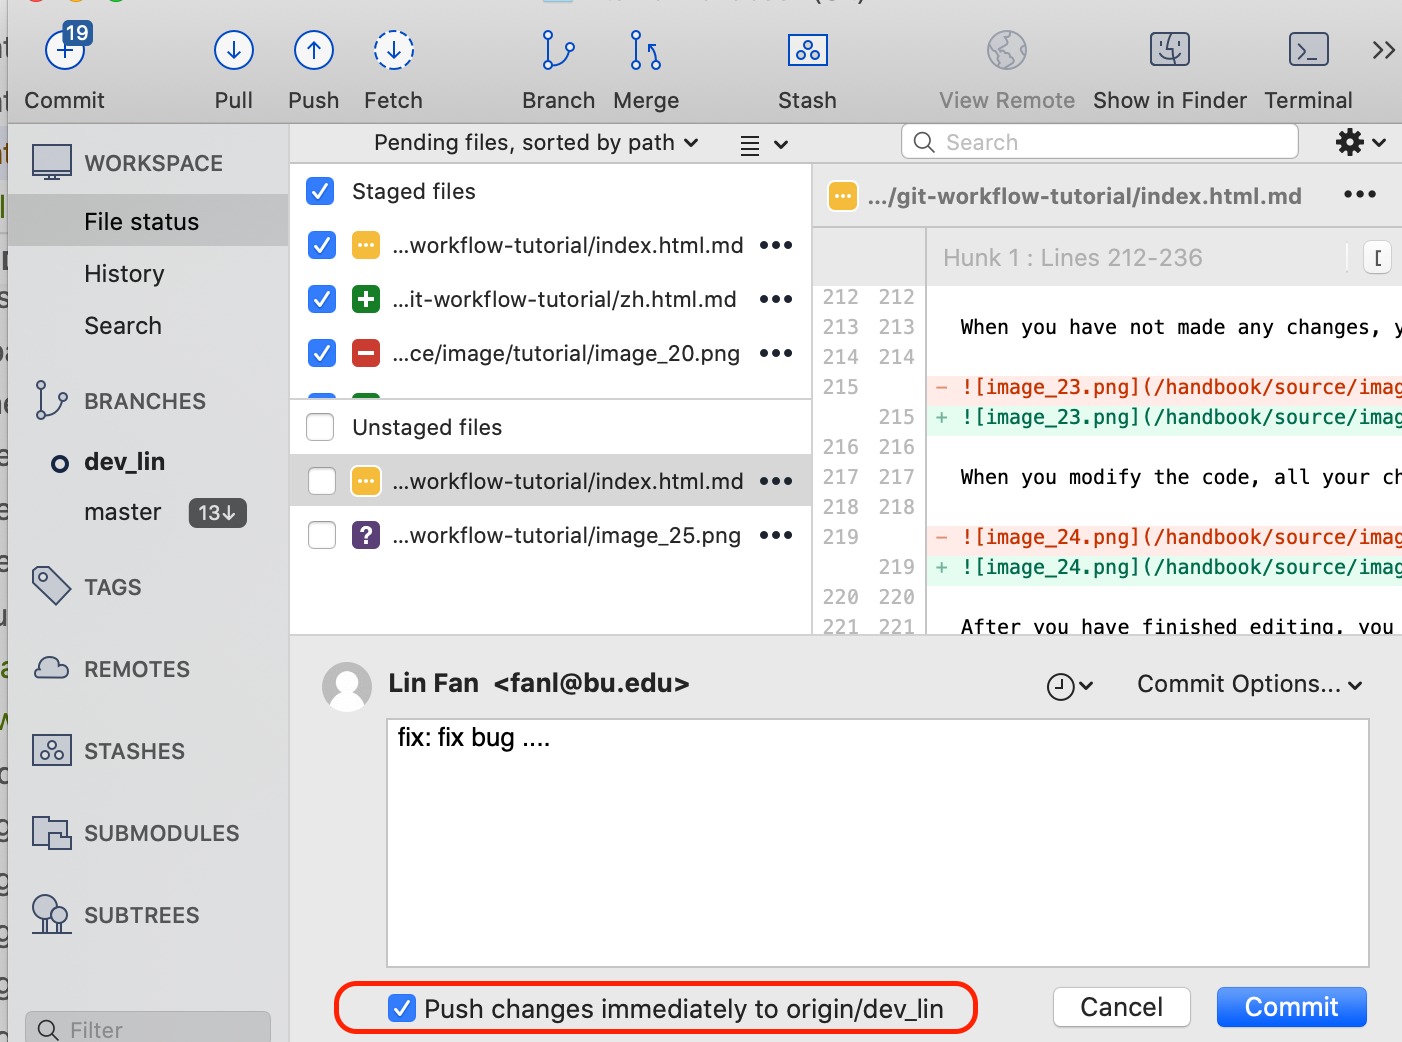
Of course, you can also choose to push immediately(not recommended) to remote repository directly:
How to resolve conflicts
When pulling the latest code from master branch and merge with your own code, conflicts my occur. Please ensure that all the conflicts are resolved before submit your code and create merge request. You can directly use the BeyondCompare installed in the previous part to resolve conflicts and use VSCode to resolve conflicts.
Conclusion
In this tutorial, we covered the basics of Git workflows, including branching, merging, and resolving conflicts. By following these steps, you can effectively collaborate on projects, track changes, and manage code using Git. Remember to regularly commit your changes and push them to a remote repository to keep your code safe and easily accessible to other team members. Happy coding with Git!